Showing posts with label decor. Show all posts

Saturday, 17 October 2015

DIY Bloody Candles for Halloween

All you need for this super easy Halloween DIY is a white pillar candle, matches, and a red candle. 


Simply light the red candle and let the wax melt, dripping it onto the white one around the circumference of its top and particularly down the sides. Make sure you do this over a protected, non-flammable surface and please be careful! As you can see, I made quite the mess. Make sure you let the candle fully cool before picking it up to move it too! They're the perfect party decoration or would look great in your window on Halloween night, to tempt Trick or Treaters to your door. However you use them they're sure to give someone a scare.

Wednesday, 26 August 2015

Desk Decor


After showing you what's on my wall above my desk in my last post, I thought I'd show you in a bit more detail what's actually on my desk. Starting from the left there's a little palm tree-esque thing that my mom gave me sitting in the pot from the June My Little Box which you can see here. There's also some roses that I picked from the garden in a milk bottle vase from Ikea, plus an Eiffel Tower that my brother brought me back from his trip to Paris and an almost empty glass sweet jar from Matalan for when I get hungry whilst I work. Which is always, let's not pretend. 
Then in the middle there is a napkin holder from Ikea that I use to hold spare pieces of paper and a plastic mat to protect my desk, also from Ikea. Underneath there are a bunch of photos I love and my college timetable arranged on a wallpaper sample from B&Q. Gotta love those things.
On the right there is a bottle of water, plus my pencil pot and then a whole load of stuff that doesn't really have a home that I always end up throwing into this pretty little crate from home Bargains in an effort to make my desk look tidy. This includes but is not limited to- a bottle of Voss water, paper straws, notebooks, post-it notes, a travel organiser/wallet from my latest My Little Box, a restaurant menu and scraps of paper that I've wrote ideas and such on.
So there we go, I hope you enjoyed...

Tuesday, 18 November 2014

DIY Wall Art


I'll let you in on a little secret, the best place to buy nerdy t shirts is either Etsy or Redbubble. I now have about 3 Redbubble T Shirts, as does my sister, but do you know one othe best things about Redbubble? Their T shirts come with tiny little pegs to attach the labels, which me being me, I have obviously been collecting. And now I have finally found a way to use them. And look how cute it looks!
The space above my new desk was looking a little empty and I thought it need a little perking up so all I did was found a few little motivational quote type photos and pegged them onto a piece of twine that I blue tacked to the wall (I didn't know what else to use). I think it looks pretty good considering  :)
The best bit is that I can change the photos really easy from season to season or just whenever I feel like it, so it will suit my room whatever happens.

Hope you enjoyed...

Sunday, 28 September 2014

2 Easy Map Themed DIY's

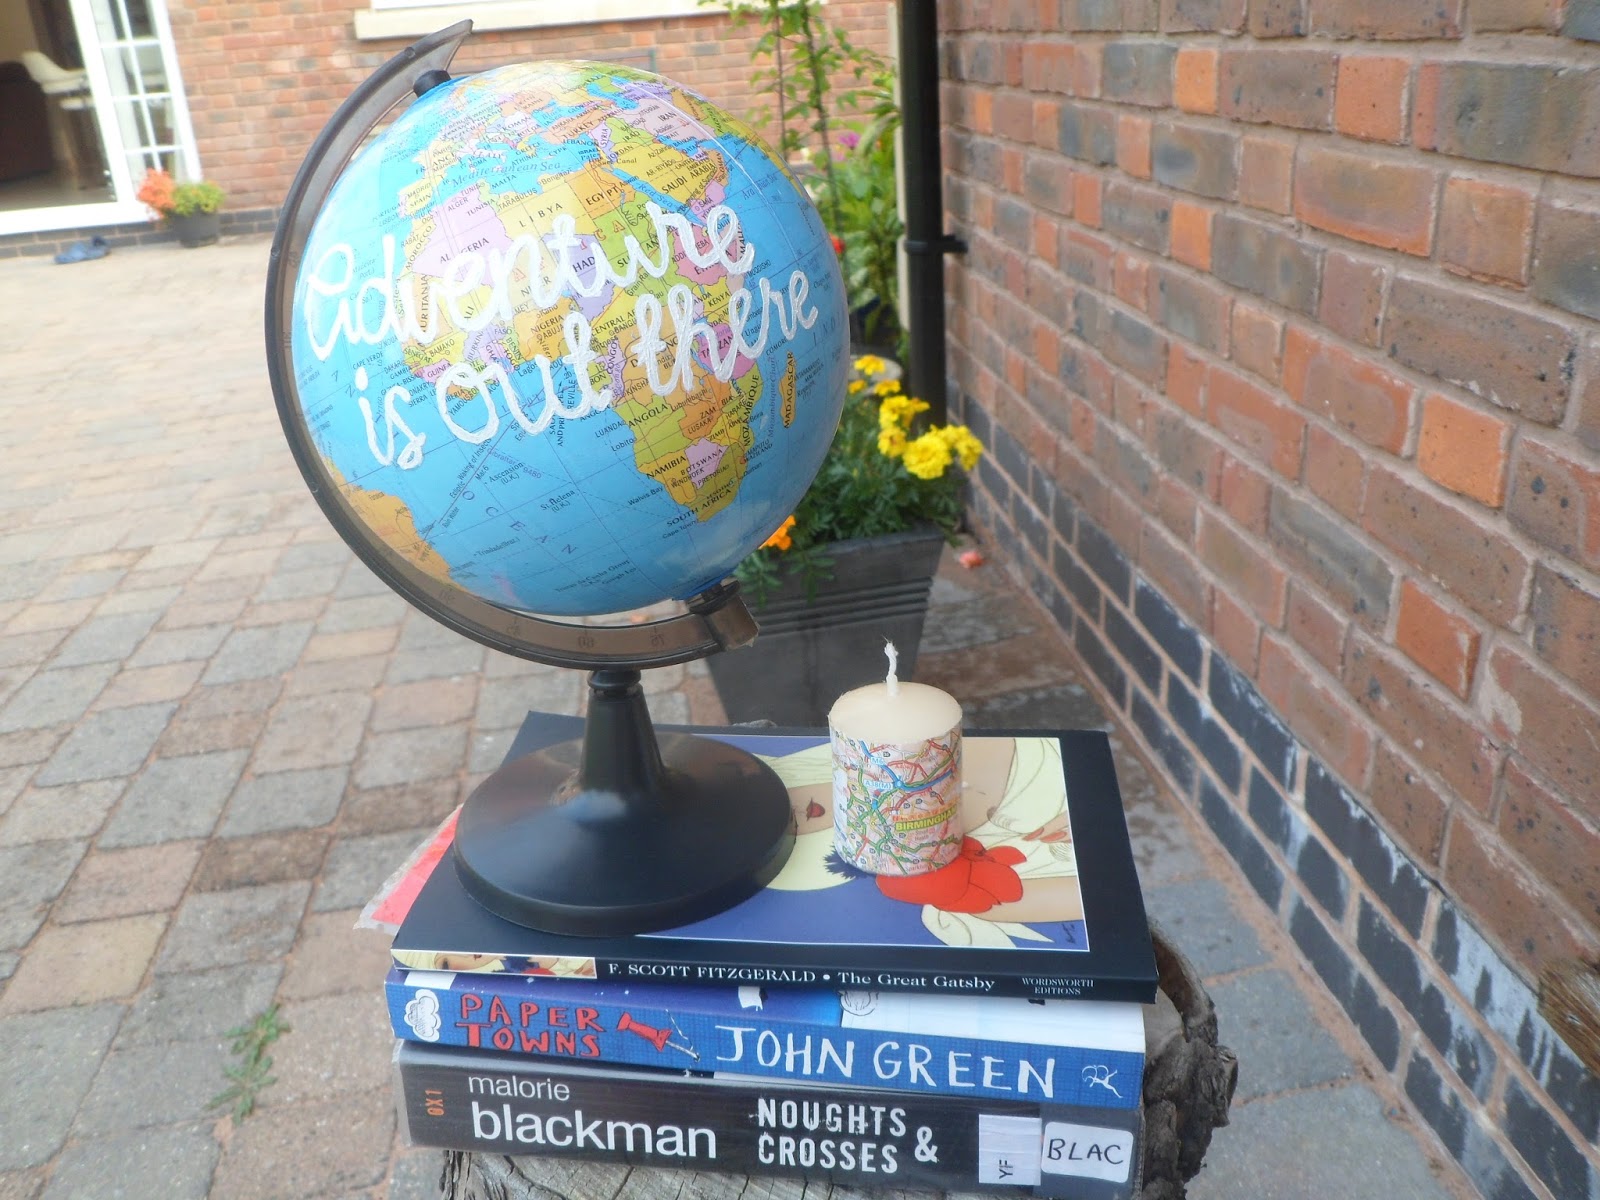
Map Candles
I basically just used this really old tutorial (Please don't laugh!) but with map pages from an Atlas. So you can just follow that tutorial if you want.

Map Heart Garland
I  made this one up as I went along to be honest but after having a quick search on pinterest I have found a couple of tutorials that you can follow here. I just used strips of map pages, staples, string and hot glue to stick the hearts to the string.


So there we go, told you they were easy didn't I!

Monday, 11 August 2014

DIY Bedroom Decor


Today I wanted to share with you a few of the DIY decorating projects that I have been adding to my room over the summer. 

PHOTO COLLAGE
The first one (the photo wall) has been there since I moved but I have added lots of new quotes to it recently (the ones above the photo collage in the centre) so I thought I would include it.


I have been collecting things and adding to the wall since I moved house which is a whole year and a half ago now! Some of the stuff was on my wall in my old house, however the main addition since moving was the big photo collage in the centre which my friends Rose and Liz made for me for my birthday last year, it was such a thoughtful gift and easily one of the best I've ever been given.

QUOTE GLOBE
I actually got the inspiration for this off of Shay Mitchell's Instagram,when she posted this picture...
When I saw it I just fell in love with it and knew I had to have a go at recreating it. Basically I just got this globe from the 99p store and drew out the quote with a pencil copying it off a picture I found online, then used white acrylic paint and went over it 4-5 times. I'm really happy with how it turned out, considering how terrible I am at painting.

DIY DREAMCATCHER
Here is a really good DIY done by one of my favourite youtubers LaurDIY that I followed to do the weaving in the centre of it. For the ring I used half of an embroidery hoop then wrapped it in twine and used an old pair of earrings that I never wore for the feathers and the charms in the bottom.

So there we go, 3 easy DIY's to for your bedroom...

Monday, 22 April 2013

Coloured Coca Cola Bottles

I love coke in glass bottles so when I saw them last summer I knew I had to buy them. After I drank them I couldn't bear to throw them away because I just love the bottles and I barely see them anywhere. So I filled each one with water and added a small amount of food colouring to each one and made a rainbow out of them...


They now stand proudly on the window ledge in my bathroom next to my mirror.


Sunday, 17 March 2013

Huge Quote Poster

I wanted some new décor for my walls and being me I was obviously not going to buy it, I wanted to make it. I decided that I wanted to use a quote or some words and set about looking on pinterest for a good but relatively short one. This is the result...

Materials:
A1 piece of paper in prefered colour (mine was £1.75 from paper chase)
White printer paper
Glue/double sided
Pencil
Scissors
Laptop for font

Method:
1. Find the font you want (I chose Words Impact) and type out your message in a word document. Make it very big.

2.Trace the silhouette over the computer screen very lightly so as not to damage it, you don't necessarily have to do it this way but it was the way I did it.

3. Cut out each letter individually and arrange them how you want them onto the piece of paper.

4. Use your preferred glueing method to stick them down. I used double sided sticky tape.

5.Then I used a pretty liberal amount of blu-tack to stick the poster to the wall.

6. Sit back and admire your handiwork.